What do you learn learn from this post?
- You will learn how to create a custom module in Drupal 7.
- You will learn how to create custom table using hook_schema() in Drupal 7.
- You will learn how to insert data into the custom table using hook_submit() in Drupal 7.
- You will learn how to fetch data from custom table and show it as a table view in Drupal 7.
Basically, The module which we are going to create will have a custom form with a custom table in the Database.
Custom modules has to be stored in the following Drupal Path,
- drupal_folder\sites\all\modules\
If you’re using xampp, then the path will be, C:\xampp\htdocs\drupal_folder\sites\all\modules
First create a folder called “custom_module” and the folder will have three files, they are,
- custom_form.info
- custom_form.install (this file is optional, it requires only if you are going to create a custom_table )
- custom_form.module
1) custom_form.info
This info file tells the Drupal and User about your module. It’s a very simple file with key-pair values, lets see the file:
name = "Custom Form"
description = "This is an example of how to create a custom form and custom table to store the data"
core = "7.x"
package = "Custom Modules"
There are plenty of other info you can put in this file, to create a simple module, this is enough.
2) custom_form.install
Like I already mentioned, this file is not always required to create a custom module, but in our tutorial it is, because we are going to create a custom table as well.
To create a custom table in Drupal, you can use hook_schema(), lets see the code:
<?php

/***
 * Implements hook_schema().
 */

function custom_form_schema(){
    //define the table name
    $schema['custom_form'] = array(
        'description' => 'Custom table created for learning drupal',
        //now lets create the table fields
        'fields' => array(
           'custom_form_id' => array(
               'type' => 'serial', //if you set type as 'serial' then the field become an autoincrement field
               'unsigned' => TRUE,
               'not null' => TRUE
           ),
           'name' => array(
               'type' => 'varchar',
               'length' => 100,
               'not null' => TRUE
           ),
           'email' => array(
               'type' => 'varchar',
               'length' => 100,
               'not null' => TRUE
           ),
           'created' => array(
               'type' => 'int',
               'description' => 'timestamp',
               'not null' => TRUE
           ),
        ),
        'primary key' => array('custom_form_id')
    );

    return $schema;
}
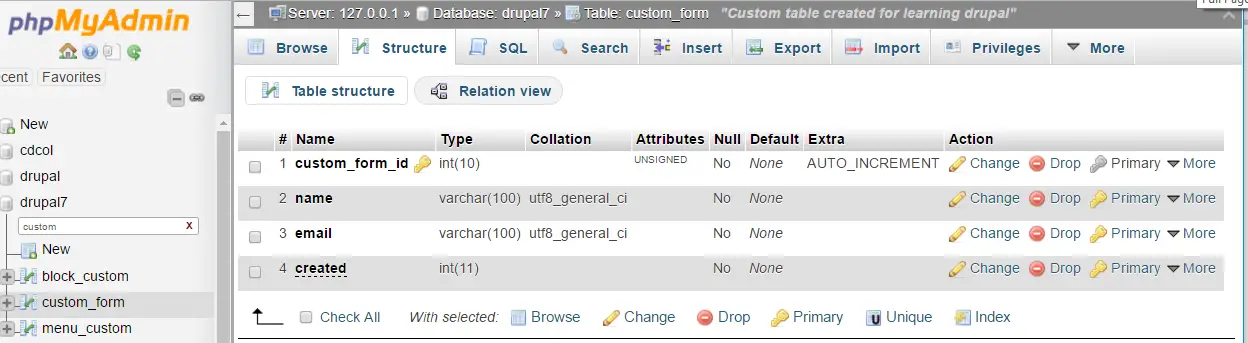
If you see the code, you can easily understand that our table name is ‘custom_form’ and there are 4 fields in the table, they are
- custom_form_id -> It’s a primary key field as well as auto incremented.
- name -> VARCHAR with length 100
- email -> VARCHAR with length 100
- created -> Integer
This file executes and creates the table at the time of enabling the module in the Drupal admin backend.
3) custom_form.module
This is the main file which will have all the logic for creating a form, inserting value into the table etc.,
<?php

/*
 * Implements hook_menu();
 * this will create a url for us to access the form page
 */
function custom_form_menu(){
    $items['custom-form'] = array(
        'title' => 'My Custom Form',
        'type' => MENU_NORMAL_ITEM,
        'page callback' => 'drupal_get_form',
        'page arguments' => array('custom_form_form'),
        'access arguments' =>  array('administer users'), //this page is accessed only if the user is logged in
        'weight' => 1
    );
    $items['custom-table-view'] = array(
        'title' => 'Custom Table View',
        'type' => MENU_NORMAL_ITEM,
        'page callback' => 'custom_table_view',
        'access callback' => TRUE, // this page can be accessed by anyone (anonymous)
        'weight' => 2
    );
    return $items;
}

/*
 * Implement hook_form()
 */

//lets create form
function custom_form_form(){

    //form fields
    $form['name'] = array(
        '#type' => 'textfield',
        '#title' => t('Name'),
        '#size' => 50,
        '#maxlength' => 100,
        '#required' => TRUE
    );

    $form['email'] = array(
        '#type' => 'textfield',
        '#title' => t('Email'),
        '#size' => 50,
        '#maxlength' => 100,
        '#required' => TRUE
    );

    $form['submit'] = array(
        '#type' => 'submit',
        '#value' => t('Save')
    );

    return $form;
}

/*
 * Let's validate the form fields
 * Implements hook_validate()
 */

function custom_form_form_validate($form, &$form_state){
    $email = $form_state['values']['email'];
    if (filter_var($email, FILTER_VALIDATE_EMAIL) === false) {
        form_set_error('email', t('Please enter valid email address'));
        return FALSE;
    }
    return TRUE;
}

/*
 * Implements hook_submit()
 */
function custom_form_form_submit($form, &$form_state){
    //lets insert the values into the db
    $insert = db_insert('custom_form')->fields(
                    array(
                        'name' => $form_state['values']['name'],
                        'email' => $form_state['values']['email'],
                        'created' => time()
                    )
                )->execute();

    drupal_set_message(t('Data saved in the db successfully!'));
}

/*
 * Custom function
 */
function custom_table_view(){
    $rows = array();
    $db_query = db_select('custom_form', 'cf');
    $db_query->fields('cf', array('custom_form_id', 'name', 'email', 'created'));
    $result = $db_query->execute()->fetchAll();
    foreach($result as $res){
        $rows[] = array($res->custom_form_id, $res->name, $res->email, date('d-m-Y', $res->created));
    }

    $header = array(t('ID'), t('Name'), t('Email'), t('Created'));

    $link_to_add_form = l('Add More','custom-form');
    return theme('table', array('header' => $header, 'rows' => $rows));
}
There are 4 Drupal hooks we have used in the above .module file, which are
- hook_menu() -> used to create a menu as well register a URL, also to include callback functions.
- hook_form() -> used to create custom form.
- hook_validate() -> This hook will trigger before form submit, so we can validate the fields.
- hook_submit() -> This hook will trigger at the time of form submission. (insert the values in the custom_table)
Now we are ready with a custom module, Let’s see how it looks in the Drupal Modules page:
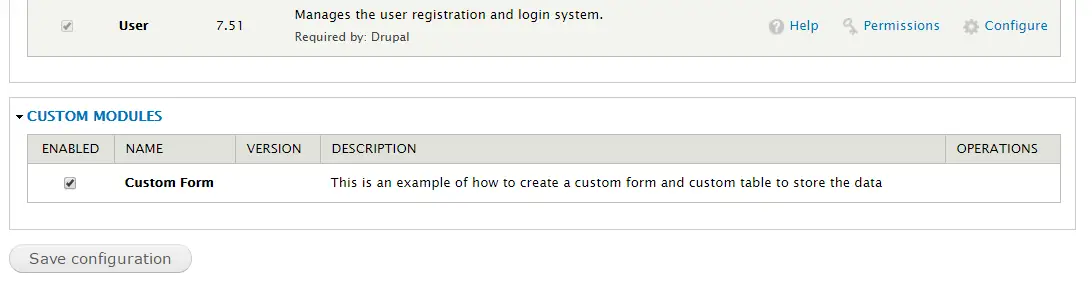
Cool isn’t it?, lets enable the module. Just click the checkbox and click “Save configuration” button to enable the module.
Once the module is enabled, you can see there is a table created in the database, see the below screenshot (custom_form):
You can also see there are two new menus created in the front end (My Custom Form and Custom Table View),
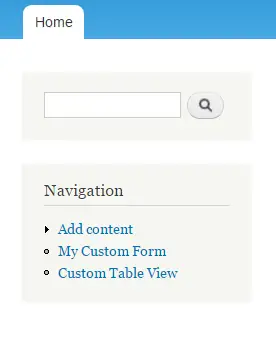
Click the My Custom Form, you will see two fields with a submit button.

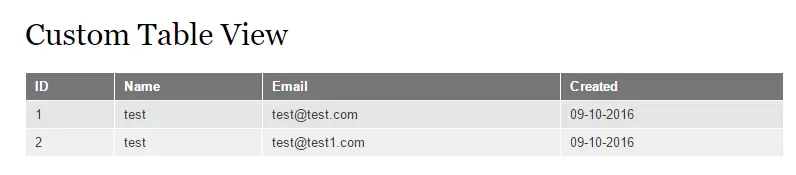
You can now enter the values in the form and click “Save” to store values in the database, to see the stored values click “Custom Table View” to see the list of records entered in the custom_table.
I hope you have learned the basics of how to create a custom module and custom table in Drupal 7.
For your convenience I have attached the module also in this post, Click the below button to download the module as a Zip.
